Plywood telecaster
BUILD GUide
This guide was written a little less than a year after the creation of this guitar. I hope this tutorial will guide how to build your own guitar (and how you can make it unique)! This guide is based on the assumption you have access to a laser cutter. If you are a student at UT Austin, you have access to laser cutters at the Texas Inventionworks after doing their respective trainings.
Also, I’m not a fan of engineering jargon and rambling. My goal is to make this guide as concise (and easy) as possible, rather than a 50-page manual that goes into the nitty-gritty of guitar making. This tutorial is for regular people who just think that building a guitar out of plywood is pretty freaking cool.
“Modern technology can be complex, but complexity by itself is neither good nor bad: it is confusion that is bad. Forget the complaints against complexity; instead, complain about confusion.” – Donald A. Norman

Step 0: Optional Changes
Below I have attached the Solidworks CAD file for the body of the guitar. Technically, electric guitars can be any shape, as long as they accommodate the electronics and hardware, connect to a neck, and are ergonomic enough to hold. I highly encourage any reader to get creative and design something uniquely personal. I will later provide guidance on adapting to any creative modifications and offer suggestions throughout the process!
First, delete the ‘split’ command at the end of the CAD file. This command was originally used to divide the guitar into layers for dimensioning. Then, feel free to make any cuts or extrusions as desired. Afterwards, use the ‘split’ command again, but this time at 1/4-inch intervals, to re-divide your new design into layers. Finally, attach each layer to its own blank drawing page, save it as a PDF, and export. Retina Engrave, the software used by the laser cutters at Texas Inventionworks, recognizes these as vector files.
Step 1: Cutting the wood
Download the PDF files I have attached below. This section assumes you know how to use a laser cutter and are trained!
you will need:
- telecaster cut vectors
- Eight 13” x 18.5” cuts of approved plywood (1/8” thick)
Instructions:
- Import the PDF into Retina Engrave
- Delete all raster files associated with the PNG
- Delete all the text left by SolidWorks
- Place the wood, level, adjust the settings, and cut the vector files. This is included with laser cutter training.
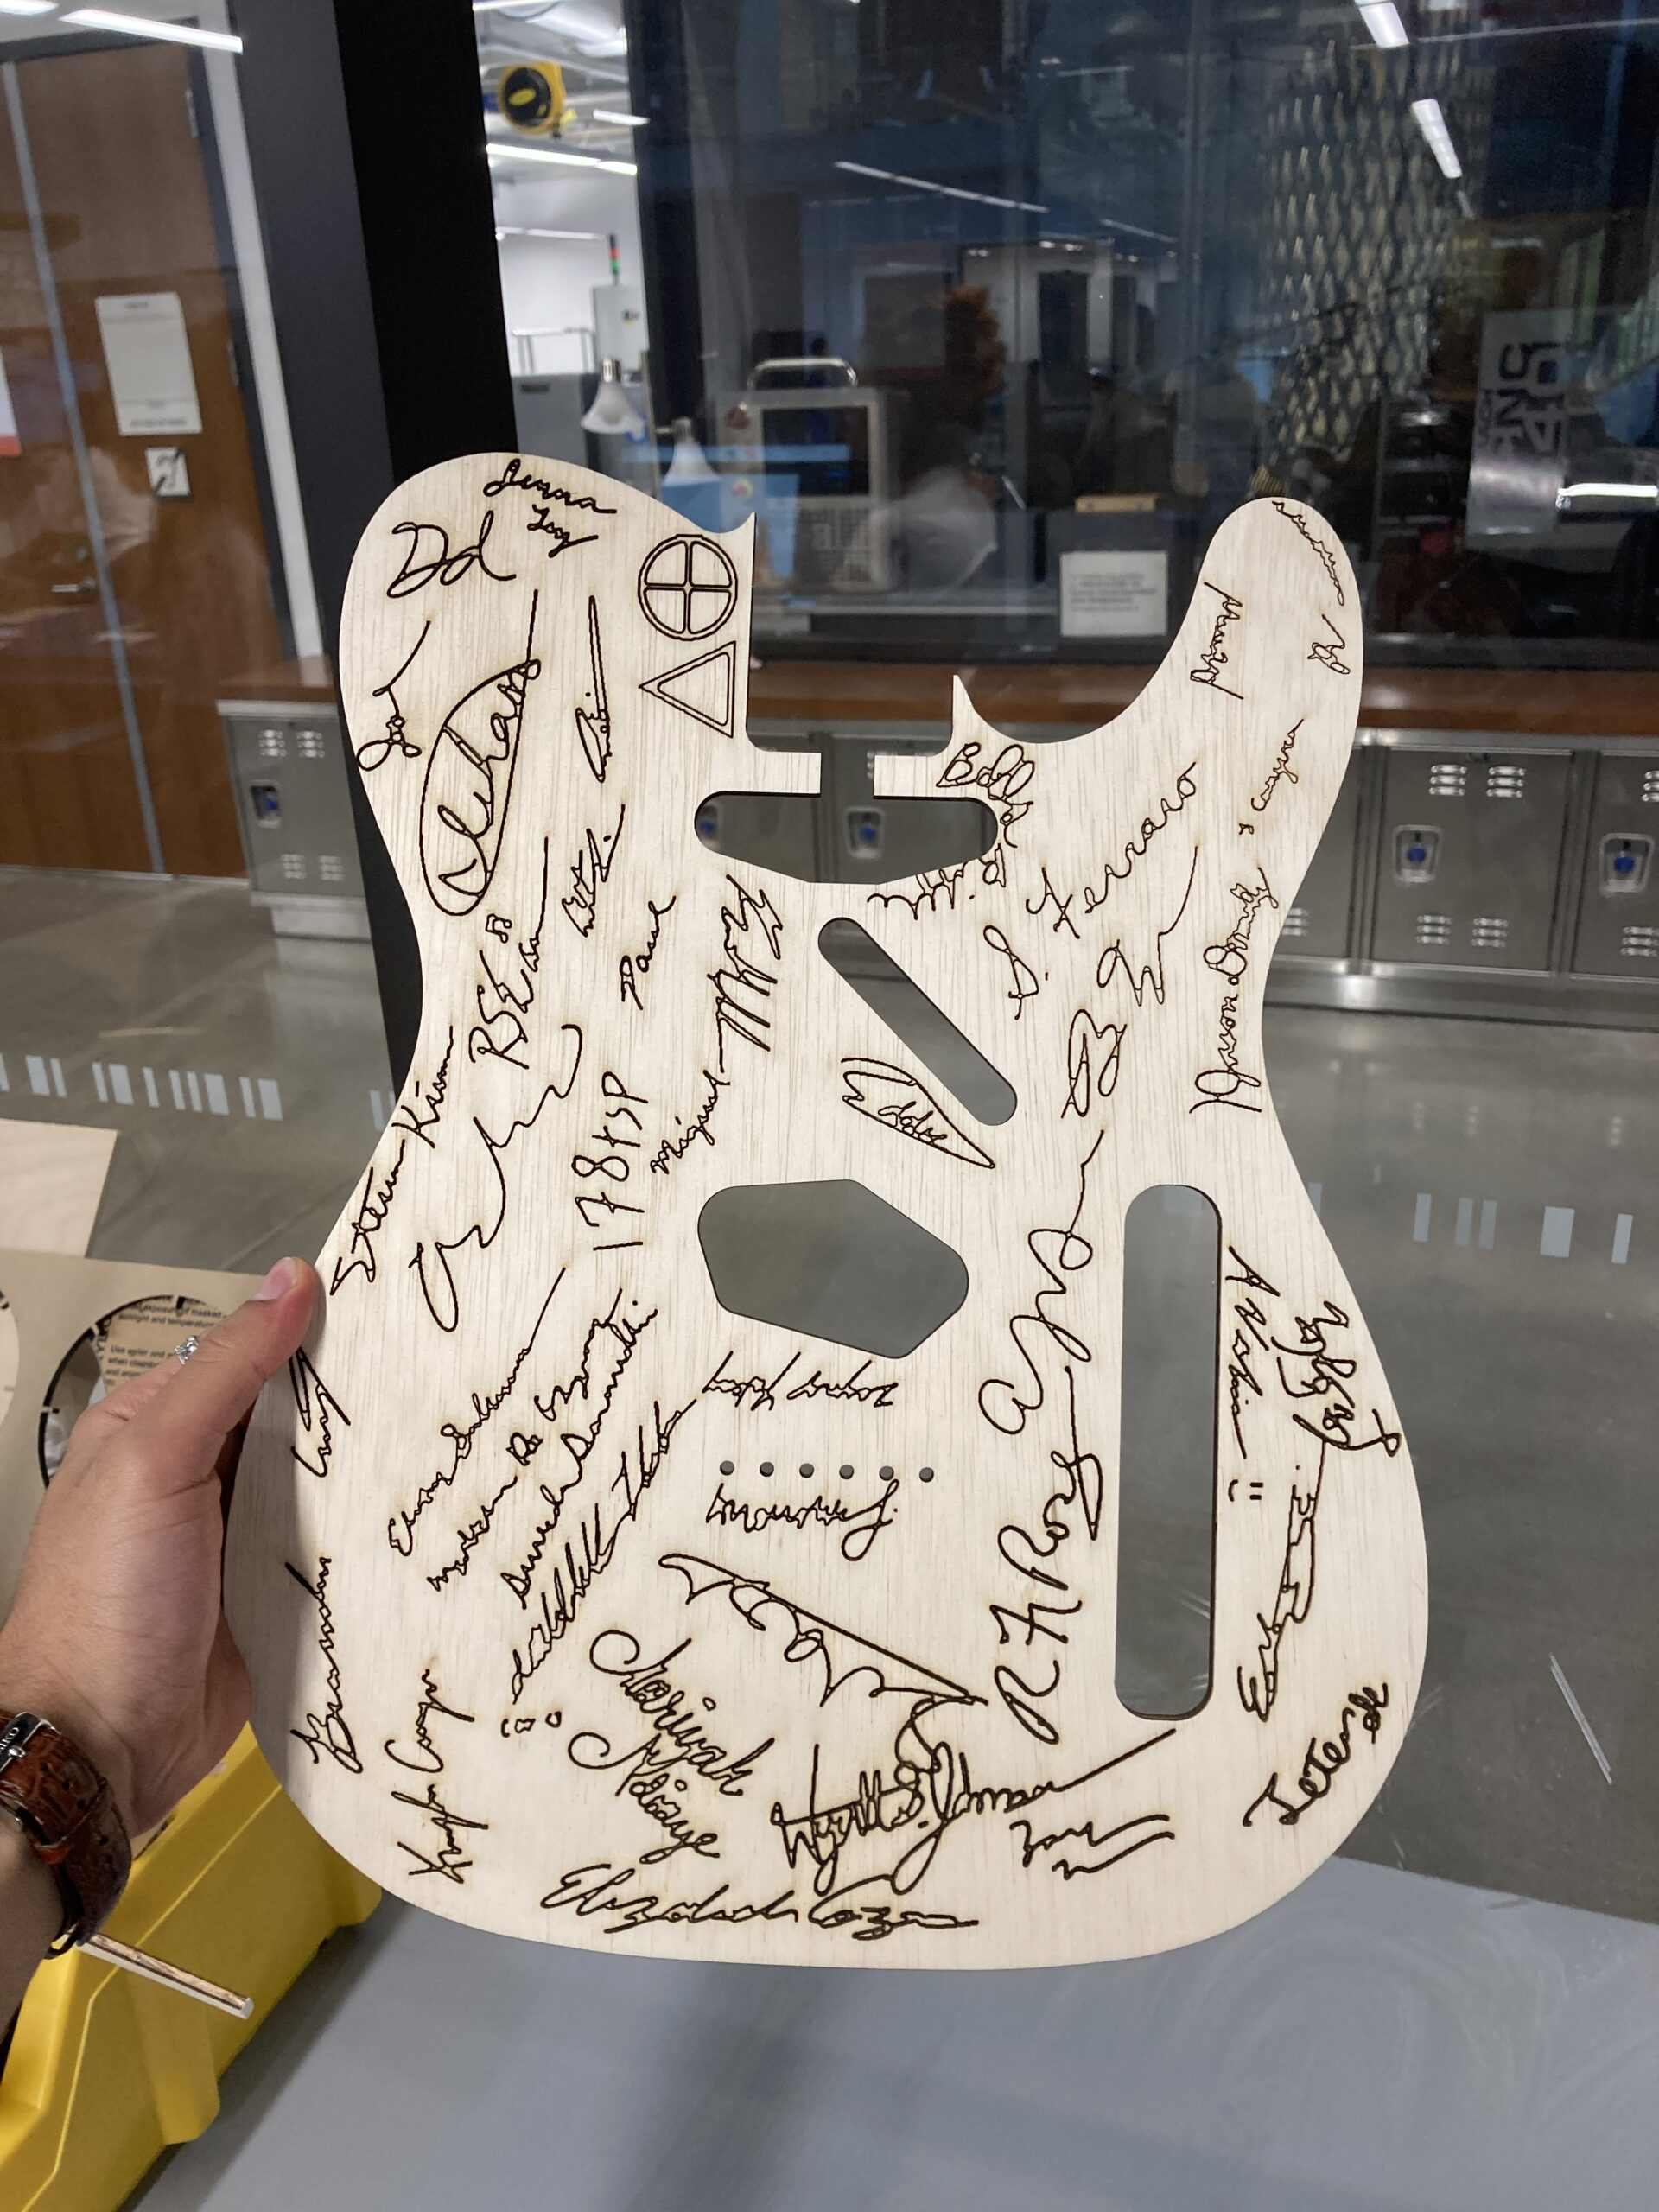
Step 1.1: Optional Engraving
- Take the top layer of the guitar (Body8.pdf) and import it into a drawing software of your choice.
- Draw anything you like over the PDF of the guitar, then leave only the drawing and erase the outline of the guitar. I wrote down the signatures of my friends and coworkers!
- Do the same steps as above, but instead make sure to overlay the image of the drawings over the vector cut of the guitar. This should either be a low-power vector or a raster depending on your needs.
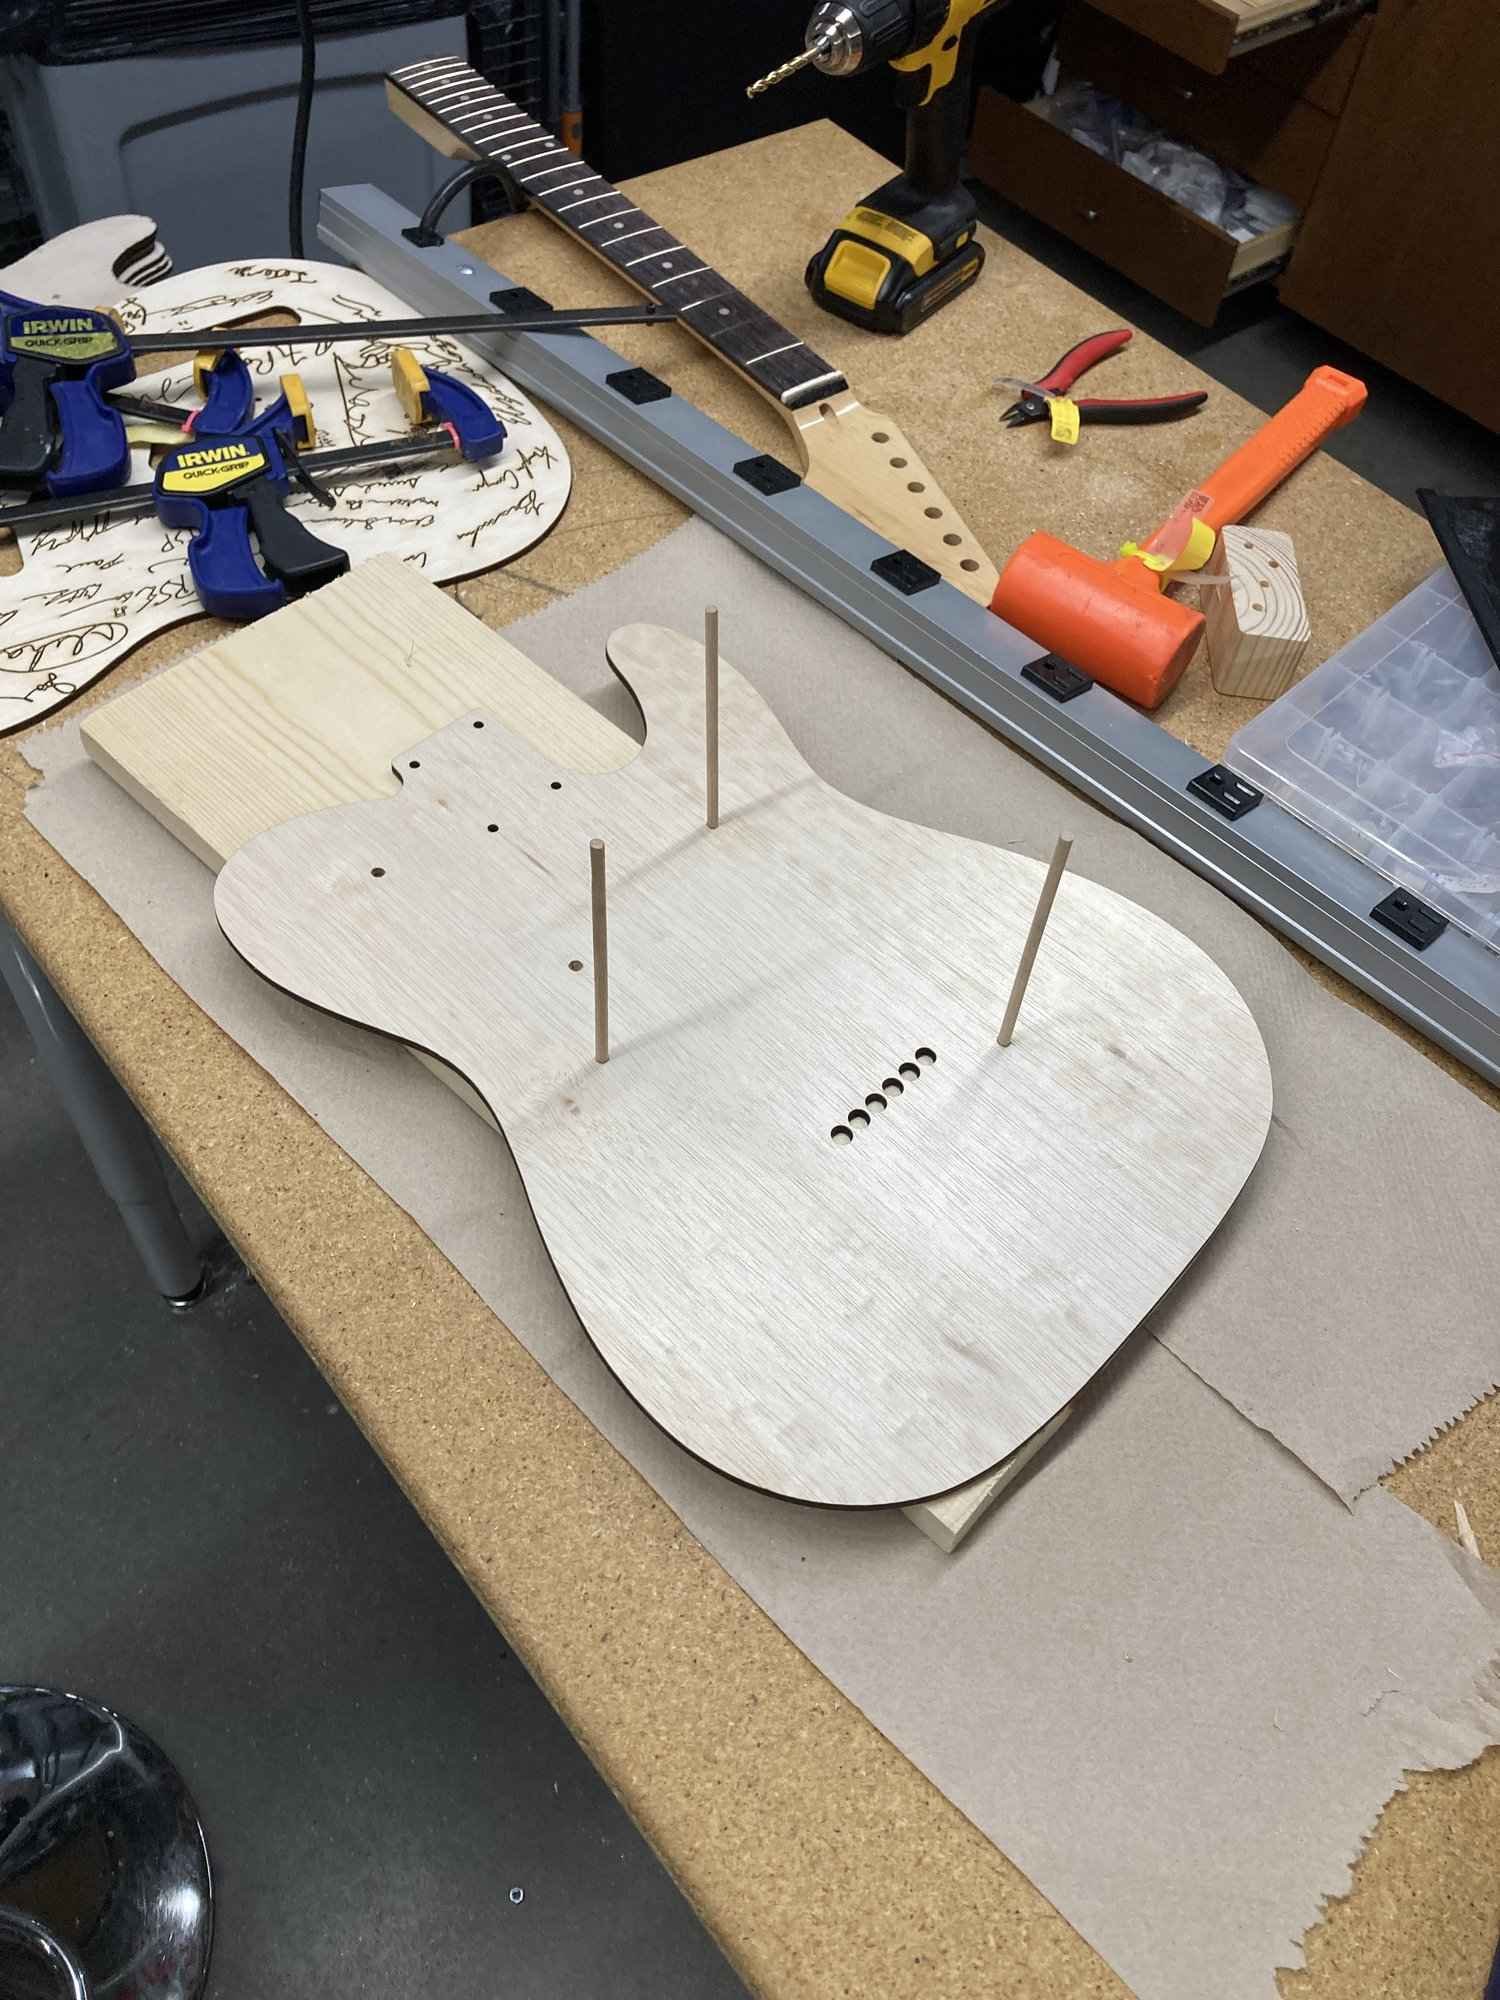
Step 2: alignment
At this step, you should have each layer of the guitar cut out successfully. Next, we need to make a pinboard to align the guitar for gluing later.
To create a pinboard, you will need:
- 1” thick piece of plywood. So long as it is about the size of the guitar and reasonably heavy, it should work.
- Minimum of 3 wooden dowels (size doesn’t matter very much, so long as it can go through the entire guitar)
- Clamps
- Power drill
- Bit that matches the diameter of the dowels.
- Hammer
Instructions:
- Stack layers 1-8 in the exact order they will be glued in. If you made an engraving, just stack Layers 1-7, and we will add the final cover separately.
- Clamp the layers together, and if possible, clamp to the 1” thick piece of plywood.
- With the guitar and plywood block attached to each other and perfectly aligned, drill 3 three holes of the same diameter as the selected dowels. Placement doesn’t matter too much, so long as they clear the cutouts for the electronics.
- Unclamp the body and remove all layers except the bottom layer.
- Hammer the dowels through the guitar and into the pinboard.
Now, as you add the layers of the guitar, they should stay in perfect alignment.
Step 3: gluing
You will need:
- Wood glue
- many Clamps
Instructions:
- Add a thin layer of wood glue to the guitar body
- Add the next layer by aligning it with the pins
- Repeat steps 1-2 only through layers 1-7. Do not glue on the cover layer.
- Generously clamp all the layers together to ensure contact with the glue
- Occasionally wipe off any extra glue that comes from the sides
- Wait at least 24 hours to dry


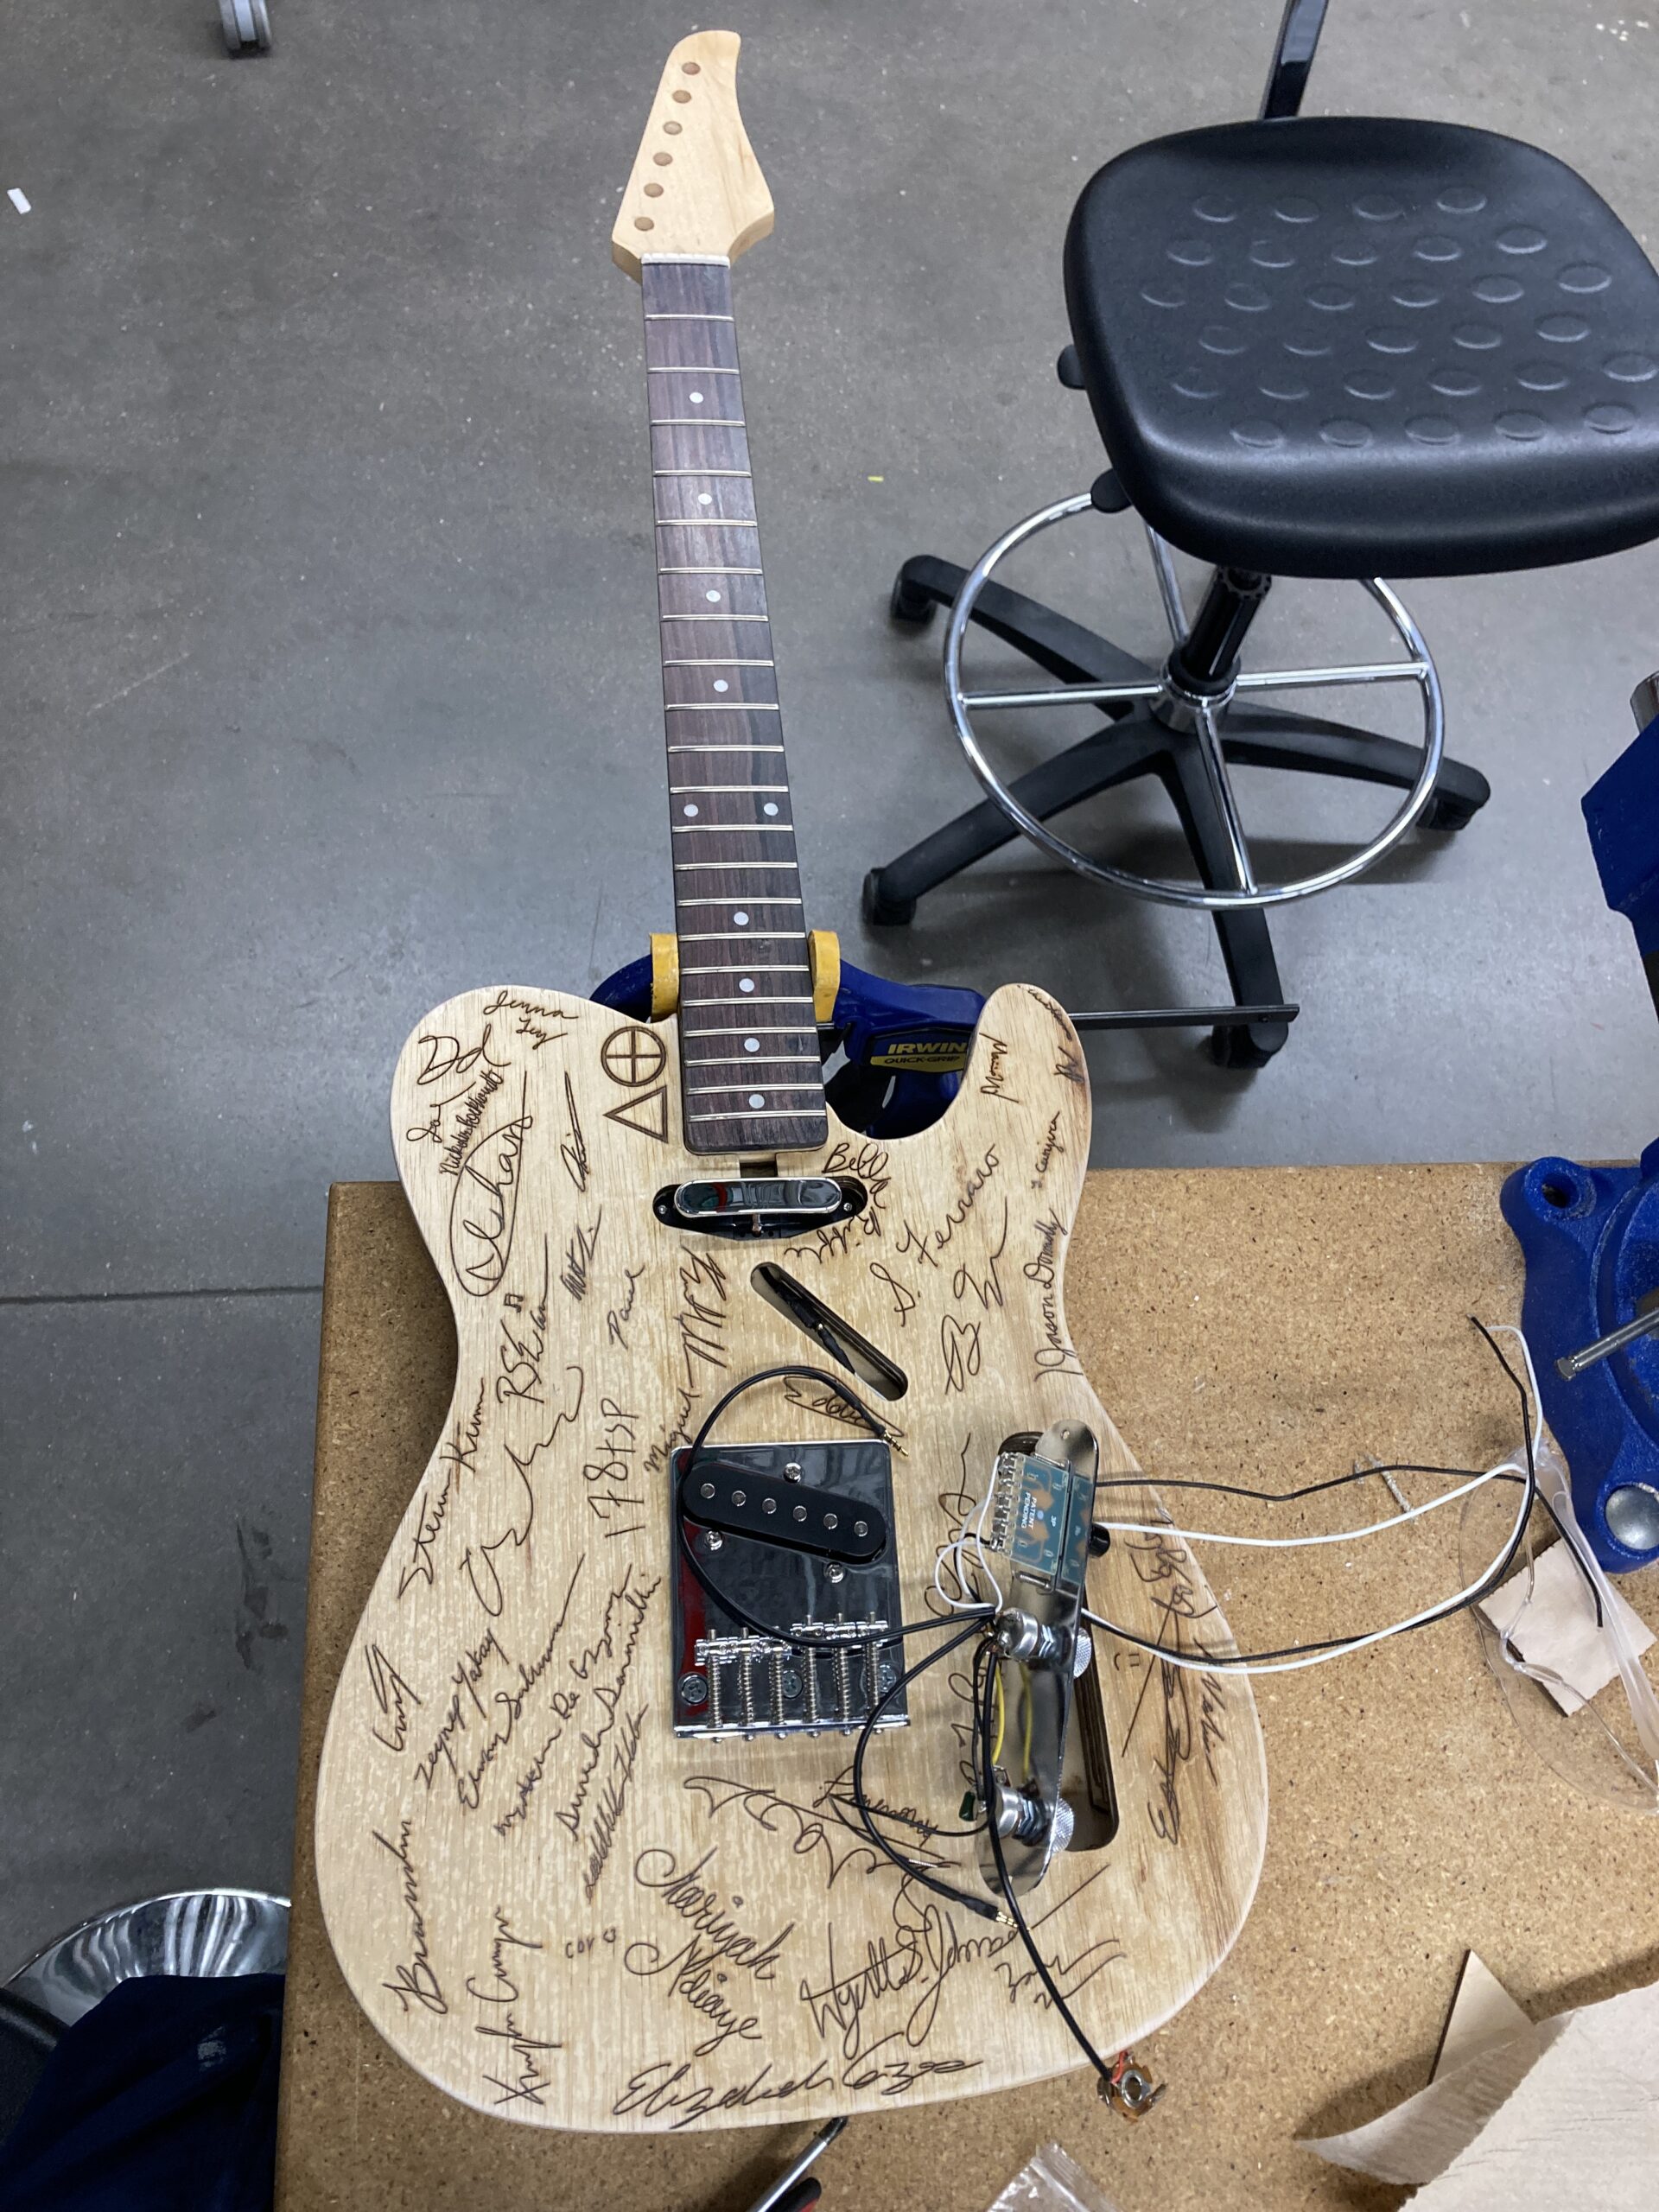
Step 4: Electronics
You will need:
- Neck Pickup
- Bridge Pickup
- 3-Way Blade Switch
- Volume Potentiometer (250k)
- Tone Potentiometer (250k)
- Output Jack (1/4″ mono)
in my case, I simplified the process and just bought a pre-wired hardware set. you can get this at multiple stores, just make sure it is in the “telecaster” style, to match the shape of our pickup cut outs. If you can disregard the horrible branding, I recommend guitarfetish.com for solid gear at a decent price. This is also where I bought my neck!
Instructions:
- Place the pickups into their respective slots and screw them in – the pickups will match the shapes of the cutouts
- Attach the ends to the knobs and switches and place them in their cutout
- Since these are pre-made harnesses, simply put the switch into the pickups.
- Place the cover layer on top and secure the fit together.
- Before screwing anything in, glue the cover layer on using wood glue and clamps.
- Once dried, Screw in the top layers of the switches, knobs, and the bottom pickup cover.
Step 5: hardware & strings
You will need:
- The electronics and hardware bundle from earlier
- Guitar strings
- A Telecaster neck
Instructions:
- Slide the neck into the groove cutout. Simply insert 4 screws into the neck using the neck plate and gasket included with the hardware bundle. This can be seen on the back of the guitar.
- Use the official tutorial by Fender to assemble the tuning pegs (linked below)
- Mount the bridge to the bottom pickup using this another video by fender (linked below).
- Screw the jackplate into the side of the telecaster to cover the jagged hole and protect the jack.
- Take the pickguard and set it into place over the pickups and around the other hardware. Screw it in.
- For the pickup controls, slide the metal cover through the potentiometers and screw in the knobs. Afterward, screw the cover into place.
- Watch this video to string the guitar (linked below)!


Step 6: tune, plug, and play
You will need:
- An amp
- A jack to plug into the amp
Instructions:
- Use an app like InsTuner to tune the guitar. The guitar from the thickest to thinnest string is standardly tuned at E2, A2, D3, G3, B3, and E4 (the number tells which octave the note is on).
- Plug into the amp and rock out!
For future reference on learning the guitar, I highly recommend Justin Guitar! He provides a beginner-to-master level course for learning guitar completely free. Further resources I’ve used linked below!

Plywood telecaster
BUILD GUide
This guide was written a little less than a year after the creation of this guitar. I hope this tutorial will guide how to build your own guitar (and how you can make it unique)! This guide is based on the assumption you have access to a laser cutter. If you are a student at UT Austin, you have access to laser cutters at the Texas Inventionworks after doing their respective trainings.
Also, I’m not a fan of engineering jargon and rambling. My goal is to make this guide as concise (and easy) as possible, rather than a 50-page manual that goes into the nitty-gritty of guitar making. This tutorial is for regular people who just think that building a guitar out of plywood is pretty freaking cool.
“Modern technology can be complex, but complexity by itself is neither good nor bad: it is confusion that is bad. Forget the complaints against complexity; instead, complain about confusion.” – Donald A. Norman

Step 0: Optional Changes
Below I have attached the Solidworks CAD file for the body of the guitar. Technically, electric guitars can be any shape, as long as they accommodate the electronics and hardware, connect to a neck, and are ergonomic enough to hold. I highly encourage any reader to get creative and design something uniquely personal. I will later provide guidance on adapting to any creative modifications and offer suggestions throughout the process!
First, delete the ‘split’ command at the end of the CAD file. This command was originally used to divide the guitar into layers for dimensioning. Then, feel free to make any cuts or extrusions as desired. Afterwards, use the ‘split’ command again, but this time at 1/4-inch intervals, to re-divide your new design into layers. Finally, attach each layer to its own blank drawing page, save it as a PDF, and export. Retina Engrave, the software used by the laser cutters at Texas Inventionworks, recognizes these as vector files.
Step 1: Cutting the wood
Download the PDF files I have attached below. This section assumes you know how to use a laser cutter and are trained!
you will need:
- telecaster cut vectors
- Eight 13” x 18.5” cuts of approved plywood (1/8” thick)
Instructions:
- Import the PDF into Retina Engrave
- Delete all raster files associated with the PNG
- Delete all the text left by SolidWorks
- Place the wood, level, adjust the settings, and cut the vector files. This is included with laser cutter training.
Step 1.1: Optional Engraving
- Take the top layer of the guitar (Body8.pdf) and import it into a drawing software of your choice.
- Draw anything you like over the PDF of the guitar, then leave only the drawing and erase the outline of the guitar. I wrote down the signatures of my friends and coworkers!
- Do the same steps as above, but instead make sure to overlay the image of the drawings over the vector cut of the guitar. This should either be a low-power vector or a raster depending on your needs.

Step 2: alignment
At this step, you should have each layer of the guitar cut out successfully. Next, we need to make a pinboard to align the guitar for gluing later.
To create a pinboard, you will need:
- 1” thick piece of plywood. So long as it is about the size of the guitar and reasonably heavy, it should work.
- Minimum of 3 wooden dowels (size doesn’t matter very much, so long as it can go through the entire guitar)
- Clamps
- Power drill
- Bit that matches the diameter of the dowels.
- Hammer
Instructions:
- Stack layers 1-8 in the exact order they will be glued in. If you made an engraving, just stack Layers 1-7, and we will add the final cover separately.
- Clamp the layers together, and if possible, clamp to the 1” thick piece of plywood.
- With the guitar and plywood block attached to each other and perfectly aligned, drill 3 three holes of the same diameter as the selected dowels. Placement doesn’t matter too much, so long as they clear the cutouts for the electronics.
- Unclamp the body and remove all layers except the bottom layer.
- Hammer the dowels through the guitar and into the pinboard.
Now, as you add the layers of the guitar, they should stay in perfect alignment.

Step 3: gluing
You will need:
- Wood glue
- many Clamps
Instructions:
- Add a thin layer of wood glue to the guitar body
- Add the next layer by aligning it with the pins
- Repeat steps 1-2 only through layers 1-7. Do not glue on the cover layer.
- Generously clamp all the layers together to ensure contact with the glue
- Occasionally wipe off any extra glue that comes from the sides
- Wait at least 24 hours to dry
Step 4: Electronics
You will need:
- Neck Pickup
- Bridge Pickup
- 3-Way Blade Switch
- Volume Potentiometer (250k)
- Tone Potentiometer (250k)
- Output Jack (1/4″ mono)
in my case, I simplified the process and just bought a pre-wired hardware set. you can get this at multiple stores, just make sure it is in the “telecaster” style, to match the shape of our pickup cut outs. If you can disregard the horrible branding, I recommend guitarfetish.com for solid gear at a decent price. This is also where I bought my neck!
Instructions:
- Place the pickups into their respective slots and screw them in – the pickups will match the shapes of the cutouts
- Attach the ends to the knobs and switches and place them in their cutout
- Since these are pre-made harnesses, simply put the switch into the pickups.
- Place the cover layer on top and secure the fit together.
- Before screwing anything in, glue the cover layer on using wood glue and clamps.
- Once dried, Screw in the top layers of the switches, knobs, and the bottom pickup cover.

Step 5: hardware & strings
You will need:
- The electronics and hardware bundle from earlier
- Guitar strings
- A Telecaster neck
Instructions:
- Slide the neck into the groove cutout. Simply insert 4 screws into the neck using the neck plate and gasket included with the hardware bundle. This can be seen on the back of the guitar.
- Use the official tutorial by Fender to assemble the tuning pegs (linked below)
- Mount the bridge to the bottom pickup using this another video by fender (linked below).
- Screw the jackplate into the side of the telecaster to cover the jagged hole and protect the jack.
- Take the pickguard and set it into place over the pickups and around the other hardware. Screw it in.
- For the pickup controls, slide the metal cover through the potentiometers and screw in the knobs. Afterward, screw the cover into place.
- Watch this video to string the guitar (linked below)!
Step 6: tune, plug, and play
You will need:
- An amp
- A jack to plug into the amp
Instructions:
- Use an app like InsTuner to tune the guitar. The guitar from the thickest to thinnest string is standardly tuned at E2, A2, D3, G3, B3, and E4 (the number tells which octave the note is on).
- Plug into the amp and rock out!
For future reference on learning the guitar, I highly recommend Justin Guitar! He provides a beginner-to-master level course for learning guitar completely free. Further resources I’ve used linked below!